In a previous post on this project I recounted installing a black glass door enclosure for the fireplace and building and installing a custom wrap-around oak mantle.
I’m happy to report that not only has progress continued but I’ve also completed this project.
The last three items from my original list included:
- moving the flat panel TV to above the fireplace on a tilt/swing-out mount;
- placing the electronic components (cable DVR, AV Receiver, etc.) in one of the bookshelves with cable runs to the TV hidden inside the new wrap-around mantle; and
- wiring cable, electrical and speaker systems to fit the new location of the components and TV.
After the mantle, the next biggest item in my mind was mounting the LCD TV. I wanted the TV to be secure but I also wished to have easy access to the connections on the back. To accomplish this I selected a Sanus VMAA26 Black Flat-panel Wall Mount w/Tilt/Swivel/Arm (see image below.)
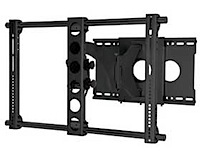 This mount can handle up to 52″ TV’s with a maximum weight of 130 lbs. The mount, as provided, is not recommended for brick or cement walls. Only wood lag bolts for mounting to wall studs are provided with the mounting hardware.
However, I drilled into the bricks themselves and used 4 – 3/8″ x 3″ Parasleeve Masonry Anchors which are each rated for 600 lb pull-out and 750 lb downforce.
The TV’s not going anywhere!
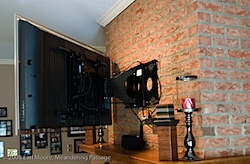
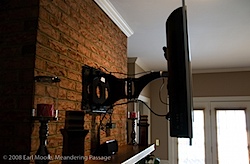
This Sanus mount allows both tilt and swivel. The TV can be extended 25″ from the wall. The mounts universal hardware mount will fit most larger standard flat-screen TV’s. To assemble, the mount fastens to the TV and the mounting plate bolts to the wall. Then the TV can be lifted into place, hooking on the mounting plate lip. For my purposes this was a high lift and was accomplished with the excellent help of my son, Aaron.
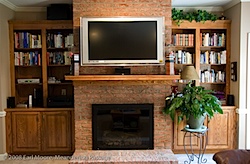
The mantle extends well beyond the normal position of the TV and provides good heat protection from the fireplace.
Moving the audio/video components to shelves left of the fireplace went well. I wired that location with a cable connection, a RJ-45 plug for network connection, power and speaker wires for a 5.1 audio set-up. The HDMI video and power wires that run through the mantle to the TV also come back to this shelf area.
I pulled speaker wire to the two wall mounted surround speakers at the back of the living room via the craw space beneath the house. The speakers are Polk Audio RM95 (Gloss Black) home theater speakers…recommended, with a great sound and look. The left and right front speakers set on the bookshelf cabinets and the center speaker mounts on the mantle beneath the TV. I placed the sub-woofer above the bookshelves on the left of the fireplace.
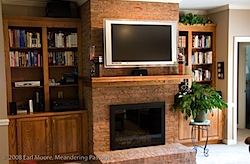
Below are photos of the finished project including views of the TV extended from the wall. (click the thumbnails below for larger images)
This project was very interesting to do. Everything went well with no major problems encountered or errors made. I believe the key to success was in-depth investigation and planning done up front. I spent hours researching information on the Internet and had a clear plan of action in mind for what I wanted to accomplish.
I’m very satisfied with the results. I know there are a few “blemishes” or “warts” but probably no one else will notice them.
Now the living room focus is at one point and not split between two opposite walls. Not only does the room seem larger but the space can be used more effectively.
Most importantly, my wife likes it. :-)
Note: After a few days of living with the results, my concerns about the TV mounting height have been alleviated. The room is large enough that viewing the TV at that position is very natural, especially if you’re kicked back on a couch or in a lounger. ;-)
Discover more from Meandering Passage
Subscribe to get the latest posts sent to your email.

